Friday, July 28, 2006

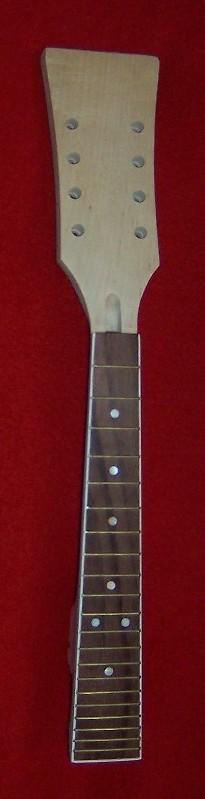
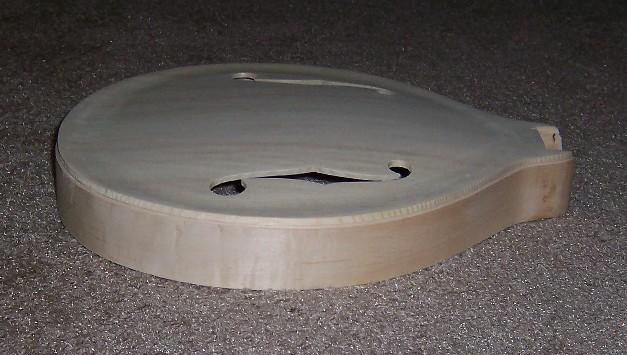
Mandolin Making Blog back online

Since I was working on a couple other blogs and I had apparently exceeded my storage space, a couple months ago I took this blog off-line. Since then, a surprising number of folks have contacted me asking "Where did it go??". I didn't realize people were still using it. Fortunately I had saved a copy of it off-line, so I've re-posted it, in a slightly different format since I had to copy/paste each post and picture. If you see a date in the body text of a post, that's the original post date. I've added a few comments to some posts, which will typically look like this at the bottom of a post- **EDIT: Somethingsomethingsomething. - Darren Kern, 7/28/06
This is to point out what I feel to be glaring newbie mistakes that I didn't know about when I first published this blog. I'm sure there are more, and I may go back through and comment on some more posts when I get time, since I'm an expert (hahahaha!) now that I'm close to completing 3 more mandolins since this one ;-)

All kidding aside, it has been fun to go back and re-post this, because I do feel that I have learned a lot since then, which is very encouraging. Thanks to all the aspiring builders that have written me to tell me how much of a help this blog has been. I hope it continues to be a useful resource for some folks. Feel free to contact me if you have any questions, need any help, or just want to tell me about your build. I'm having more fun learning to build than I ever imagined I would, and I hope you will too!
Darren

Finally finished!


After all these months, my Kern #1 mandolin has been completed. Yesterday I picked up a set of micro mesh sandpaper from a woodworking store, and let me tell you- this stuff works great. It came in grits from 1500 to 12,000. I started with 6,000 then 8,000 and finished with 12,000. After that I polished it with a McGuiar's polish, more specifically the 2nd phase of the 3 phase car polish/wax kit. Here's a few pics.

Getting close...


Looking at the pics on my last post, ugh... those are pretty ugly. Don't know what happened but my mando doesn't look like that at all. Here's a more recent one. My last coat of varnish is on, and I'm just waiting for it to dry long enough to fine sand/polish and put it together, and I'll be done. Here's a pic of the back since my last coat.

Finish progress pics


Monday, March 13, 2006

These pics were taken after my 3rd coat of varnish. I am using Tru-Oil gunstock finish, which you can get in the sporting goods section of Wal-Mart. If you search the web, you should be able to find plenty of info supporting the use of Tru-Oil as an instrument finish. The top is a little blotchier than I had hoped it would be, but I knew it would be somewhat. With no sealer coat, the spruce top soaked up the varnish like a sponge, and got dark in some areas. I think when I'm done, it will just give it an antique effect, which I consider nice. Before I do anymore coats, I need to level the finish with some fine sandpaper. You can see in the pics that there are brush marks and other types of marks that need to be smoothed out. I was just a little scared of doing that before getting a couple coats on, because of the stories I've heard about "burning through" which means sanding through to the stain or dye, and messing it up. This is very difficult to fix with a sunburst. Hopefully it will be ok that I didn't do any sanding inbetween coats, I'll find out soon enough. I did at least rough up the surface with some 0000 steel wool before putting on my 2nd and 3rd coat. And I did put on thin coats, wiping off the excess with a soft rag. Also, I am planning on doing a shellac topcoat, I'll write more about that later.

Finished staining the mandolin


Wednesday, March 01, 2006

All I have left now is scraping the binding (which I hear can take as long as 6 hours or more), and doing the finish. I am not totally sure how I'm going to do it, but a friend of mine has a spray gun and compressor, so we'll see. Here's a couple pics of the mando as it is right now. I think it will look better once the finish is on, should brighten it up quite a bit, looks a little dull right now. The spruce top was a real challenge. Some areas would get dark real easily, and some areas would wipe almost clean when I tried to blend the colors with an alcohol rag. The rest was pretty straightforward.

"Sunbursted" the back tonight

Sunday, February 26, 2006

I've spent some time almost every night for the past week or so staining my practice spruce and maple. I got to the point where I was happy with the colors I was mixing, and getting fairly consistent with blending the transitions, so I decided to go for it. I did the back first because spruce is considered harder to do. I was extremely nervous, but things went just as they had in my latest practice attempts, so there was nothing to worry about.

I'll write a few details about how I did the stain. Again, I used aniline dyes from LMI. They are an alcohol dilutable dye that come in a powder form. I rubbed the whole back with diluted plain yellow dye, and then immediately wiped as much off it off as I could with a clean rag with denatured alcohol on it (which is the alcohol I also use for the dye). I repeated this process several times, which brings out the figure, or flame in the maple. Next I started around the edge with my dark reddish brown, rubbing it from the edge to about 2 inches in all the way around. I immediately rubbed the dye vigorously with the alcohol rag, toward the center, to smooth the transition and get rid of the defined point where the dye stopped. I repeated this several times until the reddish brown started getting darker, and then I added my second color- a subtle orangish color. I added this close to where the reddish brown trailed off, and rubbed it close to the center, but not completely over the yellow center. I only did one coat of this orange, it's pretty bright, almost fluorescent, and much more would be ugly I think. Using a new clean alcohol rag, I lightly wiped the entire back a couple of times, which further smoothed the transitions and also darkened the bright yellow center to a more mellow color. I then went back and added several more coats of the reddish brown, but only went in about an inch with it, and rubbed it with the alcohol rag to smooth it with the lighter part of the reddish brown.

At this point I was very happy with the colors and the transitions, but I noticed quite a few "white" places around the edge that hadn't received the dye at all. It was obvious that there was glue causing this, so I scraped/sanded the places, re-dyed and re-smoothed with alcohol, and everything looks fine now. For my first attempt, I couldn't be more proud of the results, but I don't want to get overconfident- I still have the spruce left to go.

Dyes, stains, finishes...

Thursday, February 16, 2006

I have been spending waaaay too much time lately researching staining and finishing mandolins. A few days ago I knew NOTHING AT ALL about this, and now I know enough to be dangerous, I just need to try to put it into practice. To make a long story short, and for no other reason than some luthiers I look up to very much on the Mandolin Cafe do things this way, I am going to use alcohol dillutable dye. Originally I decided I wanted some dye similar to what Stew-Mac sells, but I didn't want to order it so I went to Woodcraft and bought 4 bottles of their TransTint brand dye at $16.99 a bottle. By the way, this is virtually the same price as Stew-Mac's brand which is ColorTone. I want to do a sunburst, so I picked out a few colors I thought could be mixed to do that, and then a bottle of black so I could do the headstock and maybe the fretboard.

After speaking with one of those luthiers on the Cafe I mentioned earlier, I found out that there was no need to pay $75 for 4 bottles. He uses aniline dye that is sold by LMI ( http://www.lmii.com ). It's a powder instead of a liquid, but both types say they make about 2 quarts total, so it's about the same. The price difference is huge- the aniline is $3.25 per container, and you can get all 6 colors for $20.25! Not much more than the price of one bottle of liquid. If you order some, make sure you know if you want alcohol soluable or water soluable, because unlike the liquid dyes I mentioned, there is a difference apparently. I did a lot of reading about what type of alcohol to use, and the general consensus (not by all, but by many) is to use denatured alcohol. I know it's much less toxic than methanol, but if you want to know more reasons, you'll have to search on your own, because I am just going with what people say works well. I'm sure it can be bought cheaper, but I was lazy and bought a fairly large container of denatured alcohol at Woodcraft for $5 and some change.

I already have a 10' spruce board to practice staining, but I didn't have any maple. I ended up buying a pack of 6curly maple veneers pieces, 12" tall x 6 1/2" wide. I've been told they are thick enough to be worth practicing on, as far as getting the colors you want and everything, and the pack was less than $10.

One thing I forgot to mention in my previous post... when I drilled the holes through my ebony overlay for the tuners, things didn't go that well. Even though I tightly clamped the headstock to another board so the ebony was sandwiched while I carefully drilled, I had enough tear-out that I had to repair the ebony. Fortunately I don't think it will be noticeable once everything is said and done, but I recommend looking into getting a reamer for this job. People do use drill bits, and I stepped up to the final bit without skipping a single size, but I still had tear-out. Weird.

#1 strung up in the white!

When I first strung it up, I just used a rosewood bridge and plastic nut, since they already had string slots in them. Initially it sounded very good- VERY loud, bell-like highs and decent mids and lows. It was a little "tinny" but I wasn't worried, figured it would mellow out over time, and after it was stained/finished. When I installed the bone nut and ebony bridge, I was blown away. The tinniness went away (I assume it was caused by the plastic nut), and now it has a full, well-rounded sound with fantastic chop when you want. It's even louder than when I started. This little mandolin compares favorably to the Gibson A9 I used to own. Never in my wildest dreams did I think that would be the case. I'm completely serious, it really sounds that good.

The playability is fantastic. I am very proud of myself for getting the neck angle right. The action can be set as low as I want or as high as I want. With a good medium action, the bridge has plenty of room to be adjusted in either direction. The side to side neck angle isn't exactly perfect, but it's close enough. I just had to make sure the tailpiece was lined up with the neck angle, NOT the center of the mandolin itself. The tailpiece is set probably about 1/4 of an inch to the side of the centerline of the mandolin. Not a great thing to have happen, but not a showstopper.

Cosmetically, I'm a little disappointed, but the verdict is still out, since I haven't stained/finished it yet. The binding leaves much to be desired. I would recommend that beginners don't use ABS plastic OR fiber binding. Just bite the bullet, pay the $25 flammable materials handling fee, and order cellulose binding. You will be glad you did. This instrument looks ok from a few feet away, but up close there are more imperfections than I had hoped there would be. I found binding to be the most difficult step to get right.

Headstock binding, and the search for glue that works with ABS

Sunday, January 29, 2006

Because of my troubles with fiber binding, and since the preferred celluloid binding now has a $25 hazmat shipping charge, I bought some ABS plastic binding from LMI. ABS is very flexible, but as I quickly found out, there's no general consensus about what glue to use. I tried Duco and one other type that I had on a scrap piece, and neither one of them stuck very well. Thanks once again to the folks on the Cafe, I decided to give some glue with MEK (Methyl Ethyl Ketone) a try. You can get it at Ace Hardware under the name Seal-All. WARNING- this stuff is very toxic, so you shouldn't be working with it without eye protection, a mask, gloves and good ventilation. This stuff bonded very well to my test piece, so I went ahead and did the binding on my headstock last night. I am happy with the results. It didn't turn out perfect, but I think it's pretty good for my first time. Once I sand the corners, I think it will be tough to notice the imperfections.

Finished carving headstock logo

Saturday, January 21, 2006

My little vice/clamp setup helped me make quick work of the rest of my logo, which is my last name. Now I'm going to decide if I want to do just my last name, or use the MOP that I have left over for some kind of design to go between the tuners. This pic is actual size, so if you've never done this before, you can get some idea how detailed even just doing letters has to be. I'm happy with the way it turned out for my first try. It's not perfect, but I think it will look nice.

Back to work on the headstock inlay


I discovered an awesome setup for cutting mother-of-pearl. I didn't think it was too difficult cutting it by hand, until I tried this. Both of these items are borrowed, but I'll be buying one for myself, no doubt. I think the key to not breaking a piece is to only have as much sticking out from the clamp as you have to. With this, regular cuts, turns and yes filing seem to go much faster and more accurately than by hand. You can get both of these items for a combined price of around $40 at Sears. One is a benchtop vice, listed for $29.99, and the other is a mini bar clamp, I think it's a little over $10.

I forgot to mention, I picked up a set of Xacto brand needle files. These are a must for working with MOP. I learned that almost nobody makes perfect cuts with a jeweler's saw, you have to go back and file the rough edges, smooth the curves, etc. This set was about $18 and well worth the price.

**EDIT: Forget this setup and buy or make a pearl cutting jig like Stew Mac sells. I'm using that now, with a blower to keep the work area clean, and it's 100 times better than this. -Darren Kern, 7/28/06

Binding troubles

Wednesday, January 04, 2006

I had a little bit of a setback when I attempted to glue the binding to my mandolin top. I bought white/black/white fiber binding because I read that it adhered to wood easily by using just regular Titebond, without knowing how difficult fiber binding is to work with for a beginner. I recommend *not* using fiber unless you have some experience. It is not very flexible, and even when I was able to bend it using heat, it doesn't have very good memory. I got glued the top binding piece and let it dry overnight, and was very unhappy with the results, so I removed it and spent several hours cleaning the glue off the mandolin wood.

I've now decided to buy ABS plastic binding through Luthier's Mercantile International. Plastic binding is more difficult to get to stick from what I've read, but much easier to bend, and that's more important to me right now.

I know I haven't posted much lately and seem to be at a standstill with my project. No worries, I will get back on track. Keep checking back for updates, I'll be doing some work on it this weekend. Oh yeah, HAPPY NEW YEAR to everyone :-)

Cough cough cough

Thursday, December 15, 2005

I haven't posted any updates in a while, because I haven't worked on my mando in a while. My little cold turned into acute bronchitis. I had the worst cough I ever had in my life, among other symptoms, and missed 2 weeks of work because of it. I doubt it's a good idea to be working with mando making tools while you're coughing, sounds like a pretty dangerous proposition :-) Anyway, I'm feeling great now but I'm not sure how much more I'll do before Christmas.

Back trimmed to shape, binding channels cut


Friday, November 25, 2005
I received my order from Roger Siminoff a few days ago, which included his binding routing tool, so I was able to cut my maple back to shape, and then cut the binding channel in the back. I also cut the top binding channel deeper to fit the WBW binding I'm going to use. Man, this thing is really looking like a mandolin! If I can shake this nasty cold I've had all week, I might even finish everything this weekend and have her strung up "in white", but we'll see. Still plenty of work to do. Carving mother of pearl with a bad cold isn't very fun.

Tips for carving mother of pearl

Monday, November 14, 2005

I started carving mother of pearl for my inlay today, I'll post more about that in the next couple of days when I finish. I just wanted to post a couple tips on here that helped me a lot. If you use a jeweler's saw for cutting the mother of pearl, run your saw blade through some beeswax. This helps the blade move through the material much smoother, and keeps it from binding and getting caught up, which leads to more blade breaks. I am still breaking more blades than I should, but each time I do, I know why it happened, and know what I could've done differently to avoid it happening.

Another tip is to make relief cuts as you go to take the pressure off the saw. Instead of trying to continue following the curve of a letter all the way around, finish one curve and keep going straight to the edge of the pearl blank, and then start a new cut where you left off. I suspect that with more practice, these relief cuts might not be necessary, but they help me as a beginner.

If you break a blade, don't automatically throw it away. A 3" piece of blade can be put back in and used again, and in some ways works better than the full length ones.

Lastly, I want to talk about my jewler's saw. I've got a generic saw frame that takes any standard 5" (and probably a little larger) blades, and right now I'm using Zona brand blades, size 0 which is 51 TPI or teeth per inch. No reason for the brand other than that's what they sold at the local hobby store in the mall. I have only found one other post on the Cafe about jeweler's saw blade sizes, and someone mentioned that they use size 3/0 61 TPI blades, which are even tinier than the ones I've got right now. I can imagine something more fragile than these size 0 blades, but I'll give them a shot.

**EDIT: Do yourself a favor and buy a quality jeweler's saw like the one that Stew Mac sells. That's the one I have now, and it's a thousand percent better than the one I used back when I wrote this blog. -Darren Kern, 7/28/06

Busy weekend

Sunday, November 13, 2005

I accomplished (and learned) a lot this weeekend. First I fitted the neck. It took some sanding on both sides of the neck joint to get the neck to drop in the slot all the way. One very important thing I learned- DO NOT use too much force when fitting the neck. Yes, it is supposed to fit snug, knowing how snug I'm sure will come with experience. I heard a sickening CRACK, but when I looked, there were no visible cracks and I think it was just an early warning that I needed to remove some more wood. Once I got the neck joint to fit, I measured the neck alignment to center. It was off to one side by about 1/4". I was very timid about trying to fix this, and posted on the Cafe. I got some guidance from "Sunburst", and realized that I was going to have to just dive in and do it. I removed some wood from one side, which made room for the neck to go to the correct angle, but it wouldn't stay there obviously. I glued in a shim and sanded it down so the neck would fit in the slot again, and the neck looked to be aligned perfectly. Next was checking the neck angle. A very simple way is the way Don MacRostie explains in the Stew-Mac videos. Just put a straight edge over the fretboard and frets, and set the bridge in place. It should meet the bridge approximately 7/64" from the top. This setting is according to Don's preferred action, so obviously there will be some trial and error involved with getting the action you want. Fortunately I was pretty close already and didn't have to adjust the neck angle.

I attempted to carve a nice design into the top of the headstock, but I quickly realized how tough a thing this is to do for a newbie with only a jeweler's saw and a flush cut saw. I ended up with a little bit of a mess, so I just cut it level and rounded the corners. A little disappointing, yes... but not the end of the world. I glued the lining in the sides to give the back a wider gluing surface, in preparation for gluing the back on. Most mandolins have a kerfed lining, this one just has a piece of wood the same width as the sides. The trick was getting the lining level with the sides.

After I glued the neck joint in, I was ready to attach the back. I test clamped it, and then glued and clamped it on. I used 15 assorted clamps in all, and while I could've used a few more, I think they did the job. After I removed the clamps the next day, I noticed that there are a few spots where the sides don't quite touch the back, I suspect because of some high spots in the lining. We're talking about a very miniscule gap here. I suspect that once I cut the back to shape and cut the binding channel, this gap won't even be noticeable. I'll know soon enough if this causes any structural problems.


Created my label :-)


Wednesday, November 09, 2005

I inserted an oval shape in MS Word, decided on a font and added the text, printed it, cut it out and dunked it in some coffee to give it an antique look.

2nd pic that goes with previous post


For some reason it wouldn't let me post 2 pictures like I had in my original blog. -Darren Kern, 7/28/06

Finished tone bars, and rough cut ebony overlay


Last night I put my wonderful finger plane to work and carved my tone bars to the first Siminoff book's blueprint sizes. Both of them together only took about a half hour, this is a very easy step. I continued to tap the wood as I was carving them, more for observation than anything, because like I've said before, I am not tap tuning in the literal sense. I'll be totally honest with you, I can tell a difference from tapping when they hadn't been carved at all vs how they are now, but some builders say they keep carving them until they get the desired "note", and I really couldn't tell much of a difference at all. I may consider taking a little more wood off the middle of the tone bars, after I do even more research on the topic. This is an area of mandolin building that is obviously still very much a mystery to most folks.
I also decided to go to work on my ebony overlay. At first I thought my jeweler's saw blade was too aggressive, so I put one of the tiny ones that I bought in the saw. It was working ok, but I broke it after just a few minutes. So that one was too small. I did figure out that the more aggressive one would work if I cut at about a 45 degree angle to the wood, so that's what I did. I don't have access to my vice right now, so I cut the wood while I was holding it, and I kind of think this might be a better way anyway than using a vice, since there are so many direction changes. I cut it to about 1/8 of an inch larger than the traced shape of the headstock, just to be safe. I plan to trim it down with my Siminoff Dremel binding router bit, when it gets here. Here's a cool pic of the top/sides with some curlies and my finger plane, and a pic of my ebony overlay. I forgot to take a pic of the completed tone bars without the curlies all over them, but you can see the bass side one in this picture.

Oh, one more thing. I'm not sure I like the looks of the rosewood(?) fingerboard with the ebony overlay, I would rather it be black, so I may ask the Cafe gurus if it's possible to stain/dye a fingerboard that already has frets and fret dots on it.

Finished carving the back!


Tuesday, November 08, 2005

Man, this is exciting. I spent a good bit of time finishing shaping the recurve on the back, and then wrote a lot of measurements on the top of the back so I could start getting everything symmetrical. I got the top shape and recurve symmetrical visually, and then carved the places that needed to be thinned from the inside. The inside has a real nice deep bowl shape to it. The true test will be once it has finish on it, imperfections and imbalances will be easy to see. I sanded with 220 last night and got it looking REALLY good, but under low light where you can see shadows, I noticed there are still some tool marks I need to work on before I can say I'm completely done. I am positive that I will finish it tonight. When my Stew Mac order first arrived yesterday, I tried my finger plane on the inside of the back, as well as on the recurve, but I could tell almost immediately that it removes way too much wood for me to use it at this stage. I easily got rid of the plane marks with my gooseneck scraper, and then continued carving with my old trusty scraper. Here is a pic of the back, not a very good one but hopefully you can see the back shape and the recurve shape.

By the way, I plan to glue the back on without cutting to the final shape. I'll trim the sides of it flush after it's been glued on, there's less room for newbie error doing it this way.

Order from Stew Mac arrived


Amazing! My order was just processed Friday, and I received it on Monday. The items were well packed, and the receipt showed that they are a very organized company. Here is a pic of my new Sloane 12mm convex finger plane, Schaller tuners, ebony bridge, ebony headstock overlay, and mother of pearl blanks for cutting my headstock inlay. That finger plane is an amazing tool. It's also a very aggressive tool, even when it is set to remove as little wood as possible. My project, and probably even a new IV kit, is too thin to use a plane, in my opinion. I can tell that it's going to be a VERY useful tool when I start building from scratch and start with much thicker wood. It is a perfect tool for shaping my tone bars, I worked on them a little bit last night just to try the plane, and it works great. I have a lot to learn about how to set it and how to use it (how much pressure to put on it, etc) but that will come with time.

Glued in the tone bars


Monday, November 07, 2005

After doing a little more fine tuning on my bass side tone bar, I finally felt comfortable enough to go ahead and glue them in. My friend loaned me some clamps that are made of plastic and click like a ratchet, and you can release them with a lever. Not sure what they are called, but the clicks aren't variable enough to work for this purpose, one click might be too loose, and it feels like if you click it again, it feels like it would be too tight and might damage the soft spruce.

So... I bit the bullet and bought three large deep bite C clamps at Lowe's. Kind of pricey, but they do a great job. I clamped all 3 of them with no glue first, using cut up pieces of a leather belt to protect the wood from the C clamps, just to make sure they were going to work well. Then I put some Titebond wood glue on the bottom of the tone bar, wiped off the excess and smoothed out the glue with my finger, and set it in place. I was surprised to see how well the tone bar stayed in place almost immediately. This made it very easy to put the clamps in place and tighten them down. If I had more clamps, I'd do both at the same time, but since I don't, I put the top with the clamps on an old sheet to support it.

Funny thing, when it came time to glue them in, I found myself a little nervous, and my hands were kind of shaky. I guess it's because they are the first things I actually glued, and I wanted to make sure I got it right. The clamps are off now, and while I won't know for sure until I start shaping them, I think they are good to go.

Ordered some stuff today

Friday, November 04, 2005
I haven't worked on my mando in the last few days, but today I was able to order the following from Stew Mac- a Sloane finger plane (12mm concave), an ebony bridge as an upgrade over the one that came with my kit, a set of Schaller tuners, a 3-1/2 x 7 x 3/32 ebony headstock overlay, and two .050x1x2 white pearl inlay blanks. I printed out a few things that I want to order from Roger Siminoff's website, but I couldn't reach him in the office today so I haven't ordered yet. I may mail an order form with a money order, since I know he's a busy guy and might not be reachable on the phone anytime soon. Here's what I'm getting from Roger- #710 binding routing tool, #100 ebony inlay filler mix, and #20 bone nut blank.

I decided that I wanted to bind the top and back both, and possibly the headstock, so I spent a great deal of time researching binding materials. I read almost every post from the last year on the Cafe about binding and binding materials, and in doing so learned that the preferred material, celluloid nitrate, is no longer readily available like it once was due to the liability in handling and shipping it. Thanks to one of the posts, I learned of a good source for it- Axiom Inc (http://www.axinc.net/). My favorite look is the white/black/white triple binding, with the ratio being 60%/20%/20%, the 20% white being closest to the body and the 60% white being on the edge of the instrument. Axiom has this, so I added a couple pieces to their shopping cart, and filled in my info so I could pay. To my surprise, when I went to check out, my total was around $45! My order was about $15, shipping was like $8, and the kicker was the $20 hazmat charge that UPS requires to handle and ship celluloid. For a luthier that makes a decent sized order, it would be no big deal, but this wasn't cost effective for me, so I cancelled my order and kept looking.

I spent a good bit more time on Stew Mac's website, and LMII's website, but couldn't really find what I was looking for. I don't want to have to laminate any binding myself. I ended up going with International Violin's white/black/white fiber binding. I read about fiber binding on the Cafe, and the few folks that have written about it say it's easy to work with, and can be glued easily with Titebond. I am anxious to see what it looks like, since International Violin doesn't show any pictures, and doesn't describe the width ratio. I'll definitely post pics on here so anyone interested can see what it looks like.

To summarize, I ordered or will be ordering everything I need to finish my mandolin. Again, many of these things are upgrades to hardware that already came with the kit. Since I'm hopefully keeping my #1 for myself, I wanted to build it with good components. Check back often for more updates, I'm going to be staying busy with this project in the next few weeks!

Tone Bars Finished

Sunday, October 30, 2005

I now own a set of the Don MacRostie/Stew-Mac videos, thanks to Yonkle from the Cafe. The video helped me learn a better technique for carving tone bars. Another Cafe member, Abarnhart, gave me a nice piece of spruce to carve new tone bars from, and I was able to finish carving both of them tonight using the technique described in the video. Fitting them to the inside of the top is what was giving me a hard time before. My successful attempt was simple as cutting a pencil to a couple inches long, sanding it almost completely in half, and drawing a line on the side of the tone bar following the inside shape of the top, and sanding the tone bar until the pencil marks disappeared. One big difference was using a somewhat solid sanding block instead of using a loose piece of sandpaper. Even though it seemed like I was keeping the wood 90 degrees with the sandpaper, it's impossible to do freehand, and the wood ends up with a "roll" to it. Repeat drawing the line on the side of the tone bar until it fits the top exacly with no gaps at all. This process shouldn't take more than about a half hour per tone bar.

Next is gluing and clamping the tone bars to the inside of the top, and then carving and tuning them to their final shape. Finishing this tonight was very encouraging, I'm starting to see the light at the end of the tunnel :-)

Before pic of my neck with the old headstock

Removing the stock peghead overlay


Tuesday, October 25, 2005

I decided from the beginning that I didn't like the veneer that came with the kit, and want to use a piece of ebony, so tonight I took on the task of removing the stock one. After reading about people sanding them off, and one guy who used a household iron to heat it, remove the veneer and sand off the glue, I decided to try the iron. It worked great. At first I tried heating it and peeling strips, until I figured out that if you heat it enough, the whole veneer can slide right off. Removing it took about half an hour, and sanding the glue off took about an hour, believe it or not. I'm happy with the results. Working on this was a nice break from working on the tone bars. I should be getting some new ones soon, by the way, and I think I will have better luck this time.

Carving tone bars (cont'd)

Monday, October 17, 2005
*&^%$#@!*&^%$#@!*&^%$#@!*&^%$#@!*&^%$#@!*&^%$#@!*&^%$#@!*&^%$#@!*&^%$#@!*&^%$#@!*&^%$#@!*&^%$#@!*&^%$#@!*&^%$#@!*&^%$#@!*&^%$#@!*&^%$#@!*&^%$#@!*&^%$#@!*&^%$#@!*&^%$#@!*&^%$#@!*&^%$#@!*&^%$#@!*&^%$#@!*&^%$#@!*&^%$#@!*&^%$#@!*&^%$#@!*&^%$#@!*&^%$#@!*&^%$#@!

I think I've pretty much ruined the treble side tone bar, have it so thin on one end that I think it's impossible to get the proper shape. The bass side bar is well on it's way to being screwed up too, but it's plenty big enough and I've stopped early enough that I'll be able to fix it, once I learn what the heck it is that I'm doing wrong. I think sandpaper isn't a great thing to use for shaping tonebars, at least for this newbie. I'm going to take a deep breath and a day or two off, and regroup. The good news is, a tiny piece of spruce like this costs almost nothing.

After reading this, I realized it makes me sound much more upset than I actually was. I was frustrated, but that's part of learning, and this post was an attempt to be somewhat humorous in conveying my frustrations :-)

Tone Bars


Sunday, October 16, 2005

I haven't had time to work on my mandolin in a while, so I was glad to get some time today. I pretty much finished carving and shaping the top, and sanded it as smoot as possible with 220 grit sandpaper. Tonight I started working on the tone bars. I did some research on the Cafe, and some reputable members said they spoke with or heard from MacRostie (I think it was him), and he did some experimentation with tone bar placement and moving them a little bit didn't seem to make a difference in the sound. Based on that info, I took several measurements from the tone bar drawing in my Siminoff book, and traced the tone bars on the inside of my mandolin top. I took only 3 measurements for each tone bar, but if you eyeball my picture and look at the drawing in the book, they look pretty much the same. I started sanding on one of them (the top one, according to my pic) and I can tell this is going to be a fairly time consuming process. The good thing is, it's not very stressful. You just work on it, check it, and work on it some more.

****IMPORTANT- Please do not pay attention to the tone bar placement on this picture and the following pictures. I misunderstood the view of the diagrams in the first Siminoff book and did them in reverse. The bass side tone bar should be the one that's closer to the F hole, not the treble side tone bar. Thanks, Darren Kern 7/28/06

Wednesday, July 05, 2006

Curlies


If your scraper is properly sharpened, your shavings should look be curly thin shavings, not a bunch of dust.

EDIT- Actually if this scraper was really sharp, the curlies would be much... curlier :-) Keep at it, this takes a little practice. - Darren Kern, 7/28/06

Tap tuning

I forgot to mention that I have been "tap tuning" for lack of a better description, during my whole carving process. It's not really tap tuning by the literal definition, because I'm not trying to tune the plates to a particular note. Siminoff believes in tuning each plate to a note, and then tuning the instrument once it's together to a note. After reading Cafe posts on the subject for hours and hours, I've settled on a conclusion and philosophy for myself personally, based on my experience level. When I tap the wood, all I'm checking for is a good ringing note, and trying to make sure there are no dead spots. There were some dead spots when I first started carving, especially on the back, but now no matter where you tap the wood on either plate, you hear a nice resonating note.

Another back pic

Here's another pic I took of the back after I rubbed it with a damp rag to bring out the figure. I know you typically don't do that until right before you stain/finish, but I like to do it every once in a while to see how it's looking.

Carving the mandolin back


I am having a little more trouble getting a nice shape on my back plate, there are several reasons. 1) The plate started out so thick.2) Maple is much harder wood than spruce.3) Unlike the top, the back isn't cut to it's final dimensions, there's about 1/2" around the outside that will have to be trimmed. So I had to place the top/sides where I think it should go, and trace the shape onto the back so I knew where to start the recurve.Still, I'm getting there... the shape is getting more to my liking, and I'm getting closer to the proper thickness. Here's a progress pic.

Quick safety note

It might be a good idea to wear a glove when burnishing a scraper, especially a goose neck scraper which because of the curves, it's easy to slip with the burnisher. I sliced my thumb open pretty good last night while burnishing the smaller curve on the goose neck.

Working on carving the plates to final specs


Friday, September 16, 2005

Now that I've learned how to use my scraper, I have been working on shaping the soundboard and back to a nice looking shape, and thinning them toward the final specs I am shooting for. Here's a pic of my soundboard, I'm pretty happy with the rough shape of it so far. The folks on the Cafe said I should get a good shape on the outside, and do most of the thinning on the inside, and that makes good sense to me.

One thing I've learned from the last couple of nights. Maple is pretty forgiving as to what direction you carve, I guess since it's a harder wood. Spruce, at least in the case of my soundboard, is not so forgiving. If I don't carve the proper direction, the scraper tears the wood and leaves a very jagged and ugly surface. It doesn't take long to get a feel for the right direction to carve. I'll bet if I go back to my Understanding Wood book, it will explain more about this.

I have quite a bit of thinning left to do on the soundboard, but like I said I think I like the shape pretty well and won't do much more to it. The back board is another story. That plate was very thick and had no shape at all, so I've put a lot of time into it so far, and needs quite a bit more shaping before I'll feel comfortable posting a pic of it here.

This post is kind of backwards, but I thought I should comment on how I got my dimensions. The old Siminoff book that comes with the IV kits doesn't have top and back plate dimensions written out, but it does have a plan that shows cross section dimensions of 7 locations on an F5 mandolin. I borrowed a friend's digital calipers, took a bunch of measurements on these cross sections, and transferred them to a photocopied plan of a soundboard in a topo map type format. This has been very helpful for me in shaping and thinning my plates. I took lots of measurements around the recurve area specifically, and actually made marks on the plates to use as a guide when carving. If I lose track of where I'm working and the marks are gone, I'll stop and mark them again. Eventually the shape starts happening and making sense to me, and I don't have to use the written dimensions as much. Seems like you can get the feel for it, almost like modeling clay. What a rambling paragraph, hope all that makes sense to somebody other than me.

I've never owned a set of calipers, but I now realize how valuable they are. I ordered a set of digital calipers that one of the engineers at work recommended, they will get here on Monday.

Using a scraper

I bought a gooseneck scraper at the woodworking store, and did some reading about how to use them. Thanks to some Cafe members and some articles they posted links to, I learned that you can't just use a scraper right out of the package, you have to burnish it first. This process confused me at first, but I get it now. I got a good square edge and tried to use one of my screwdrivers to finish burnishing it, but it's obviously not made of solid steel- metal was being removed from the screwdriver but the scraper was unaffected. I'll go out tomorrow and find something I can use.

Here are a couple good links talking about burnishing scrapers-http://www.taunton.com/finewoodworking/pages/w00007.asp
http://www.brendlers.net/oldtools/scraping/scraper.htm

I did go by Harbor Freight, and they have dial guages there on sale for $6.95, so I picked one up. I plan to build my thickness caliper tomorrow.

**I told you when I started that I am really a beginner at this stuff. Lots of people say they are a beginner, but they have some experience in this or that. I really have no woodworking experience at all, but I'm determined to learn.

Mandolin Cafe

Wednesday, August 31, 2005

The Cafe is such an amazing resource. Even though I don't have time to dive into my project quite yet, I am still gaining knowledge. I asked the best way to remove tool marks from my mandolin's plates, and the general consensus is to use a scraper. I plan to pick one up this weekend at the woodworking store by Sam Ash in Raleigh, and I'm also going to Harbor Freight to get a dial gauge to make my thickness caliper. After I have this tool made, I will be able to start working on the recurve.

Sanding

Sunday, August 28, 2005

I spent a little time today starting to sand the machining marks out of the top and back, by hand with 100 grit sandpaper. I won't have much time over the next few weeks to work on my mando, but after 18 September I should have all the time in the world. Expect more regular updates around that time.

International Violin mandolin kit arrived today

Saturday, August 27, 2005

International Violin mandolin kit arrived today
To see pics of the kit, go to my webshots album- http://community.webshots.com/album/434319027pJSQCt

Making a Mandolin

I will be using this place to document my first attempts at making mandolins, first from kits and then hopefully carving them from wood myself. I have been talking with Roger Siminoff http://www.siminoff.net/ about his kits and what parts/tools I need to get started. I will be ordering one of his kits eventually, but I have already ordered a kit from International Violin http://www.internationalviolin.com/ which I will build first. This kit is a very simple and amazingly inexpensive (around $100), and I think it will be a big benefit to gain experience with something like this, before I dive into one of Roger's more complicated F5 mandolin kits.